Signs you need this
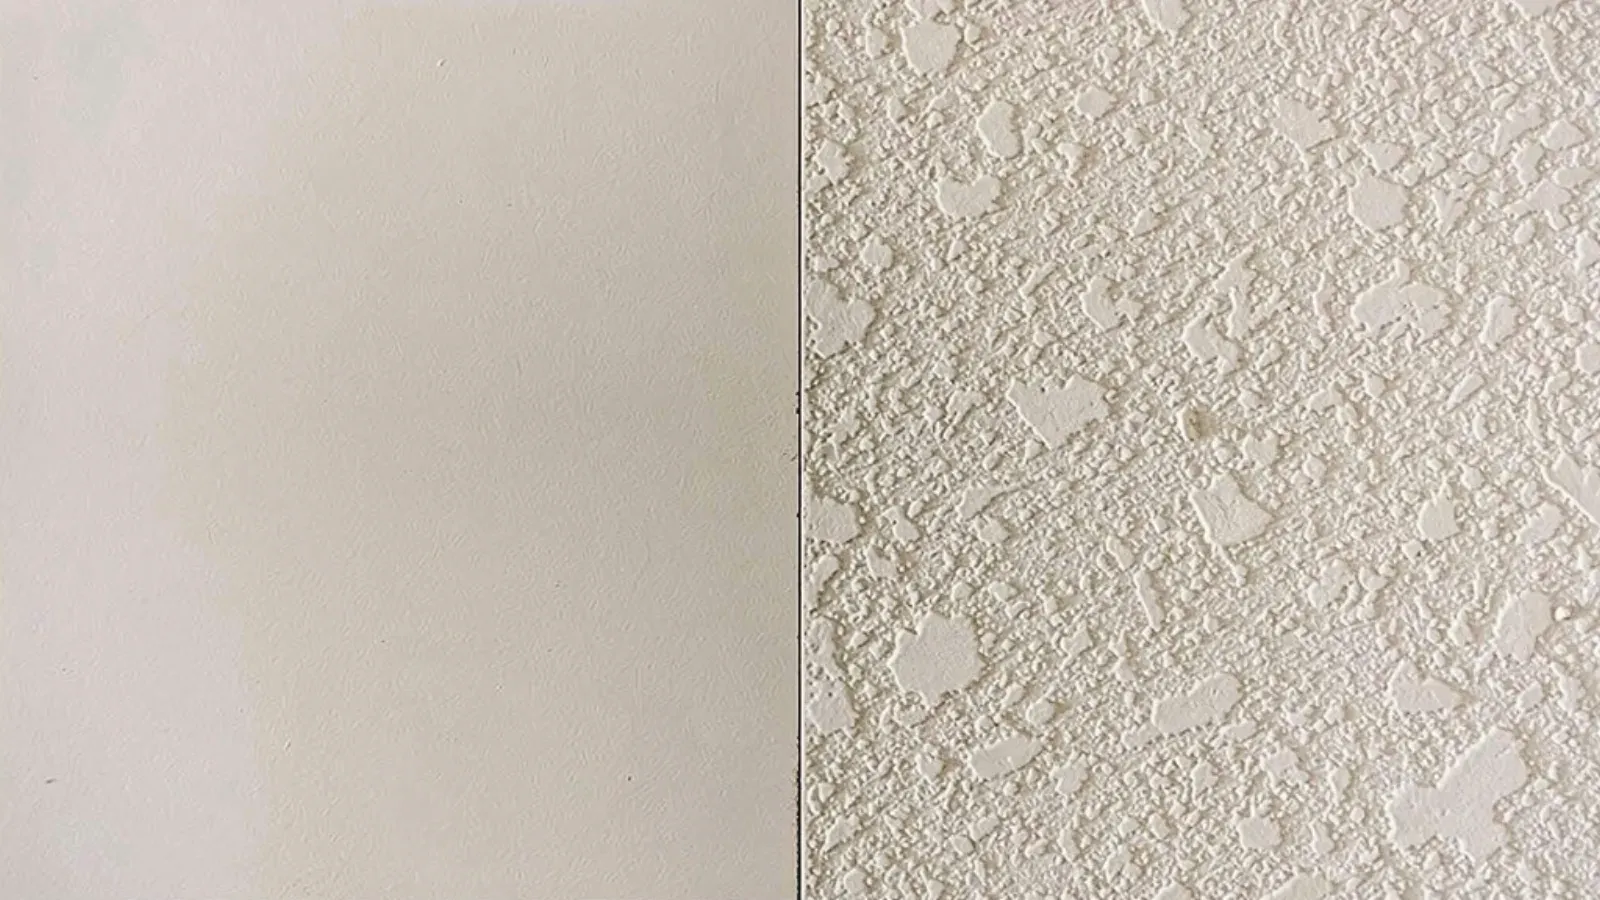
- • A patch from a plumbing or electrical repair is smooth and flat while the surrounding wall or ceiling has a visible knockdown or orange-peel texture, so the repair stands out like a scar
- • A previous patch job, done by another contractor or a homeowner's own attempt, was never textured at all and reads as an obvious flat rectangle under any angled light
- • A drywall repair is structurally fine but was never blended into the surrounding wall, so the homeowner is left staring at a mismatch every time they walk past it
Why a flawless patch can still ruin a wall
Norwalk Drywall & Plaster gets called into East Norwalk homes more often than any other part of the city for a specific complaint: the patch is fine, but it’s obvious. A plumber cut into a wall to fix a supply line, closed it up with a competent flat patch, and moved on, because texture matching isn’t a plumber’s job and shouldn’t be. The result is a smooth rectangle sitting inside a wall that’s covered in knockdown or orange-peel texture everywhere else, and it reads as clearly as if someone had drawn a box around the repair. Homeowners in East Norwalk’s older single-family homes and workers’ cottages run into this constantly, since so much of that housing stock carries an original textured finish that was applied decades ago and has its own particular density and pattern. A patch that’s structurally perfect and cosmetically obvious isn’t actually finished, and that’s the gap we’re hired to close.
Matching an existing texture is a different skill than applying one, and it’s easy to underestimate how much trial and error goes into it. We’re not picking a texture from a menu, we’re reverse-engineering one that’s already on the wall: is it a hopper-sprayed knockdown that’s been flattened with a trowel at a certain pressure, a finer orange-peel stipple, or an older hand-applied skip trowel with an irregular, almost random pattern. Each of those needs a different tool, a different compound consistency, and a different hand technique to reproduce, and we always test on scrap or an inconspicuous spot first rather than experimenting directly on the patch. Getting the pattern right but the scale wrong, too fine or too coarse compared to the original, is just as visible as no texture at all once the room is painted and lit.
The edge is what actually gives a bad match away
The part of texture matching that separates a good result from an obvious one isn’t the texture in the middle of the patch, it’s the transition at the edges. A hard line where matched texture stops and original texture starts will telegraph through paint just as clearly as an untextured patch does, especially under the angled light that comes through an east-facing window in the morning, which is exactly the lighting condition a lot of these older Norwalk homes get. We feather the texture out past the actual patch boundary into the surrounding original surface, blending density gradually rather than trying to draw a clean edge, so there’s no single line for the eye to catch. On a faded or worn original texture, that blending has to account for how the surrounding surface has aged too, not just how it looked when it was new, since a crisp fresh knockdown pattern dropped next to a decades-old, slightly worn one will still stand out even with the right pattern. We check every match under a raking work light before we call it done, the same angle that would expose a mismatch once the room is painted and the sun crosses it, because that’s the test a homeowner will eventually apply whether we run it ourselves or not.
Materials & standards
Products & materials we use
- USG Sheetrock
- National Gypsum Gold Bond
- joint compound (setting-type and pre-mixed)
- FibaTape
Standards & codes we work to
- ASTM C1396 / C840
- GA-214 finish levels
What the terms mean
- knockdown texture
- orange peel texture
- skip trowel
- texture matching
- transition zone
- joint compound
- blend patch
Options & variants
| Option | When it applies | Cost |
|---|---|---|
| Knockdown texture match | Most common residential texture, flattened stipple pattern | Standard cost, common enough that matching is straightforward |
| Orange peel texture match | Finer, stippled texture common on ceilings and some walls | Similar cost to knockdown, slightly more technique-dependent |
| Skip trowel / hand-applied match | Older or custom textured walls with an irregular hand-troweled pattern | Higher cost, requires more trial passes to match density and depth |
| Texture removal instead of matching | Homeowner decides to eliminate texture entirely rather than match it | Different scope, closer to a skim coat than a texture match |
What affects cost
- • Which texture pattern is on the wall, since a hand-applied or custom texture takes more trial-and-error to match than a standard knockdown
- • Size and number of patches needing texture blended in
- • Age and wear of the surrounding texture, since a faded or worn original pattern can be harder to match than a fresh one
- • Whether the whole wall needs a light texture pass to blend the transition zone, not just the patch itself
- • Access and protection needs around furniture, flooring, and fixtures near the patch
What to expect
- 1
Identify the existing pattern
We look at the surrounding texture up close and at an angle to identify the pattern type and figure out what tool and technique likely produced it.
- 2
Test the match before touching the patch
We test the texture on a scrap board or an inconspicuous area first, comparing it against the original before touching the actual patch.
- 3
Apply texture to the patch and transition zone
We apply the matched texture to the patch and a small transition zone around its edges, since a hard line between old and new texture is as visible as no texture at all.
- 4
Check the match under angled light
We let it cure, then check the match under angled light, the same test that will reveal a mismatch once the room is painted.
- 5
Prime and hand off paint-ready
We prime and hand it off paint-ready, or paint it ourselves if that's part of the job.
When this isn’t the right call
- If the underlying patch itself hasn't been done yet, that's ordinary drywall repair first; texture matching only comes after the patch is structurally sound and taped.
- If the homeowner actually wants the texture gone entirely rather than matched, a skim coat to a smooth Level 5 finish is the better fit, not a texture match.
- If the surface in question is plaster on lath rather than drywall, our plaster repair and conversion work is the right starting point before any texture decision.
- If the ceiling texture in question is original popcorn texture that hasn't been tested, popcorn ceiling removal (with asbestos testing first) needs to happen before any texture work, matched or otherwise.
Frequently asked questions
Can you really match a texture that's decades old, or will the patch still look slightly different? +
In most cases yes, a well-matched patch disappears once it's painted, but an older, faded, or worn texture takes more careful testing since we're matching both the pattern and how it's aged, not just a fresh application.
Our plumber already patched the hole but didn't texture it. Can you just texture the patch? +
Yes, as long as the patch itself is sound and properly taped underneath. We check that first, then match and blend the texture over it.
What's the difference between knockdown and orange peel texture? +
Knockdown starts as a stipple pattern that's then flattened slightly with a trowel, giving it a mottled, irregular look. Orange peel is a finer, more uniform stippled texture without the flattening step, closer to the surface of the fruit it's named for.
Will you need to texture the whole wall, or just the patch? +
Usually just the patch and a small blended transition zone around its edges, unless the surrounding texture is so worn or faded that a hard line would still show even with a good pattern match.
Can you match a hand-applied or custom texture, not just standard knockdown or orange peel? +
Yes, though it takes more test passes to get right, since hand-applied and skip-trowel textures are irregular by nature and depend on matching the same tool and hand technique that created the original.
Do we need to paint after the texture match, or does that come with the job? +
Texture matching leaves the patch primer-ready; painting is a separate step we can include if the homeowner wants the whole wall repainted to blend the sheen as well as the texture.